
Product Details
Order:
100015184Category:
Home/Garden/ToolsPackage:
Product:
FloorcarePlan:
Monthly PlanManufacturer:
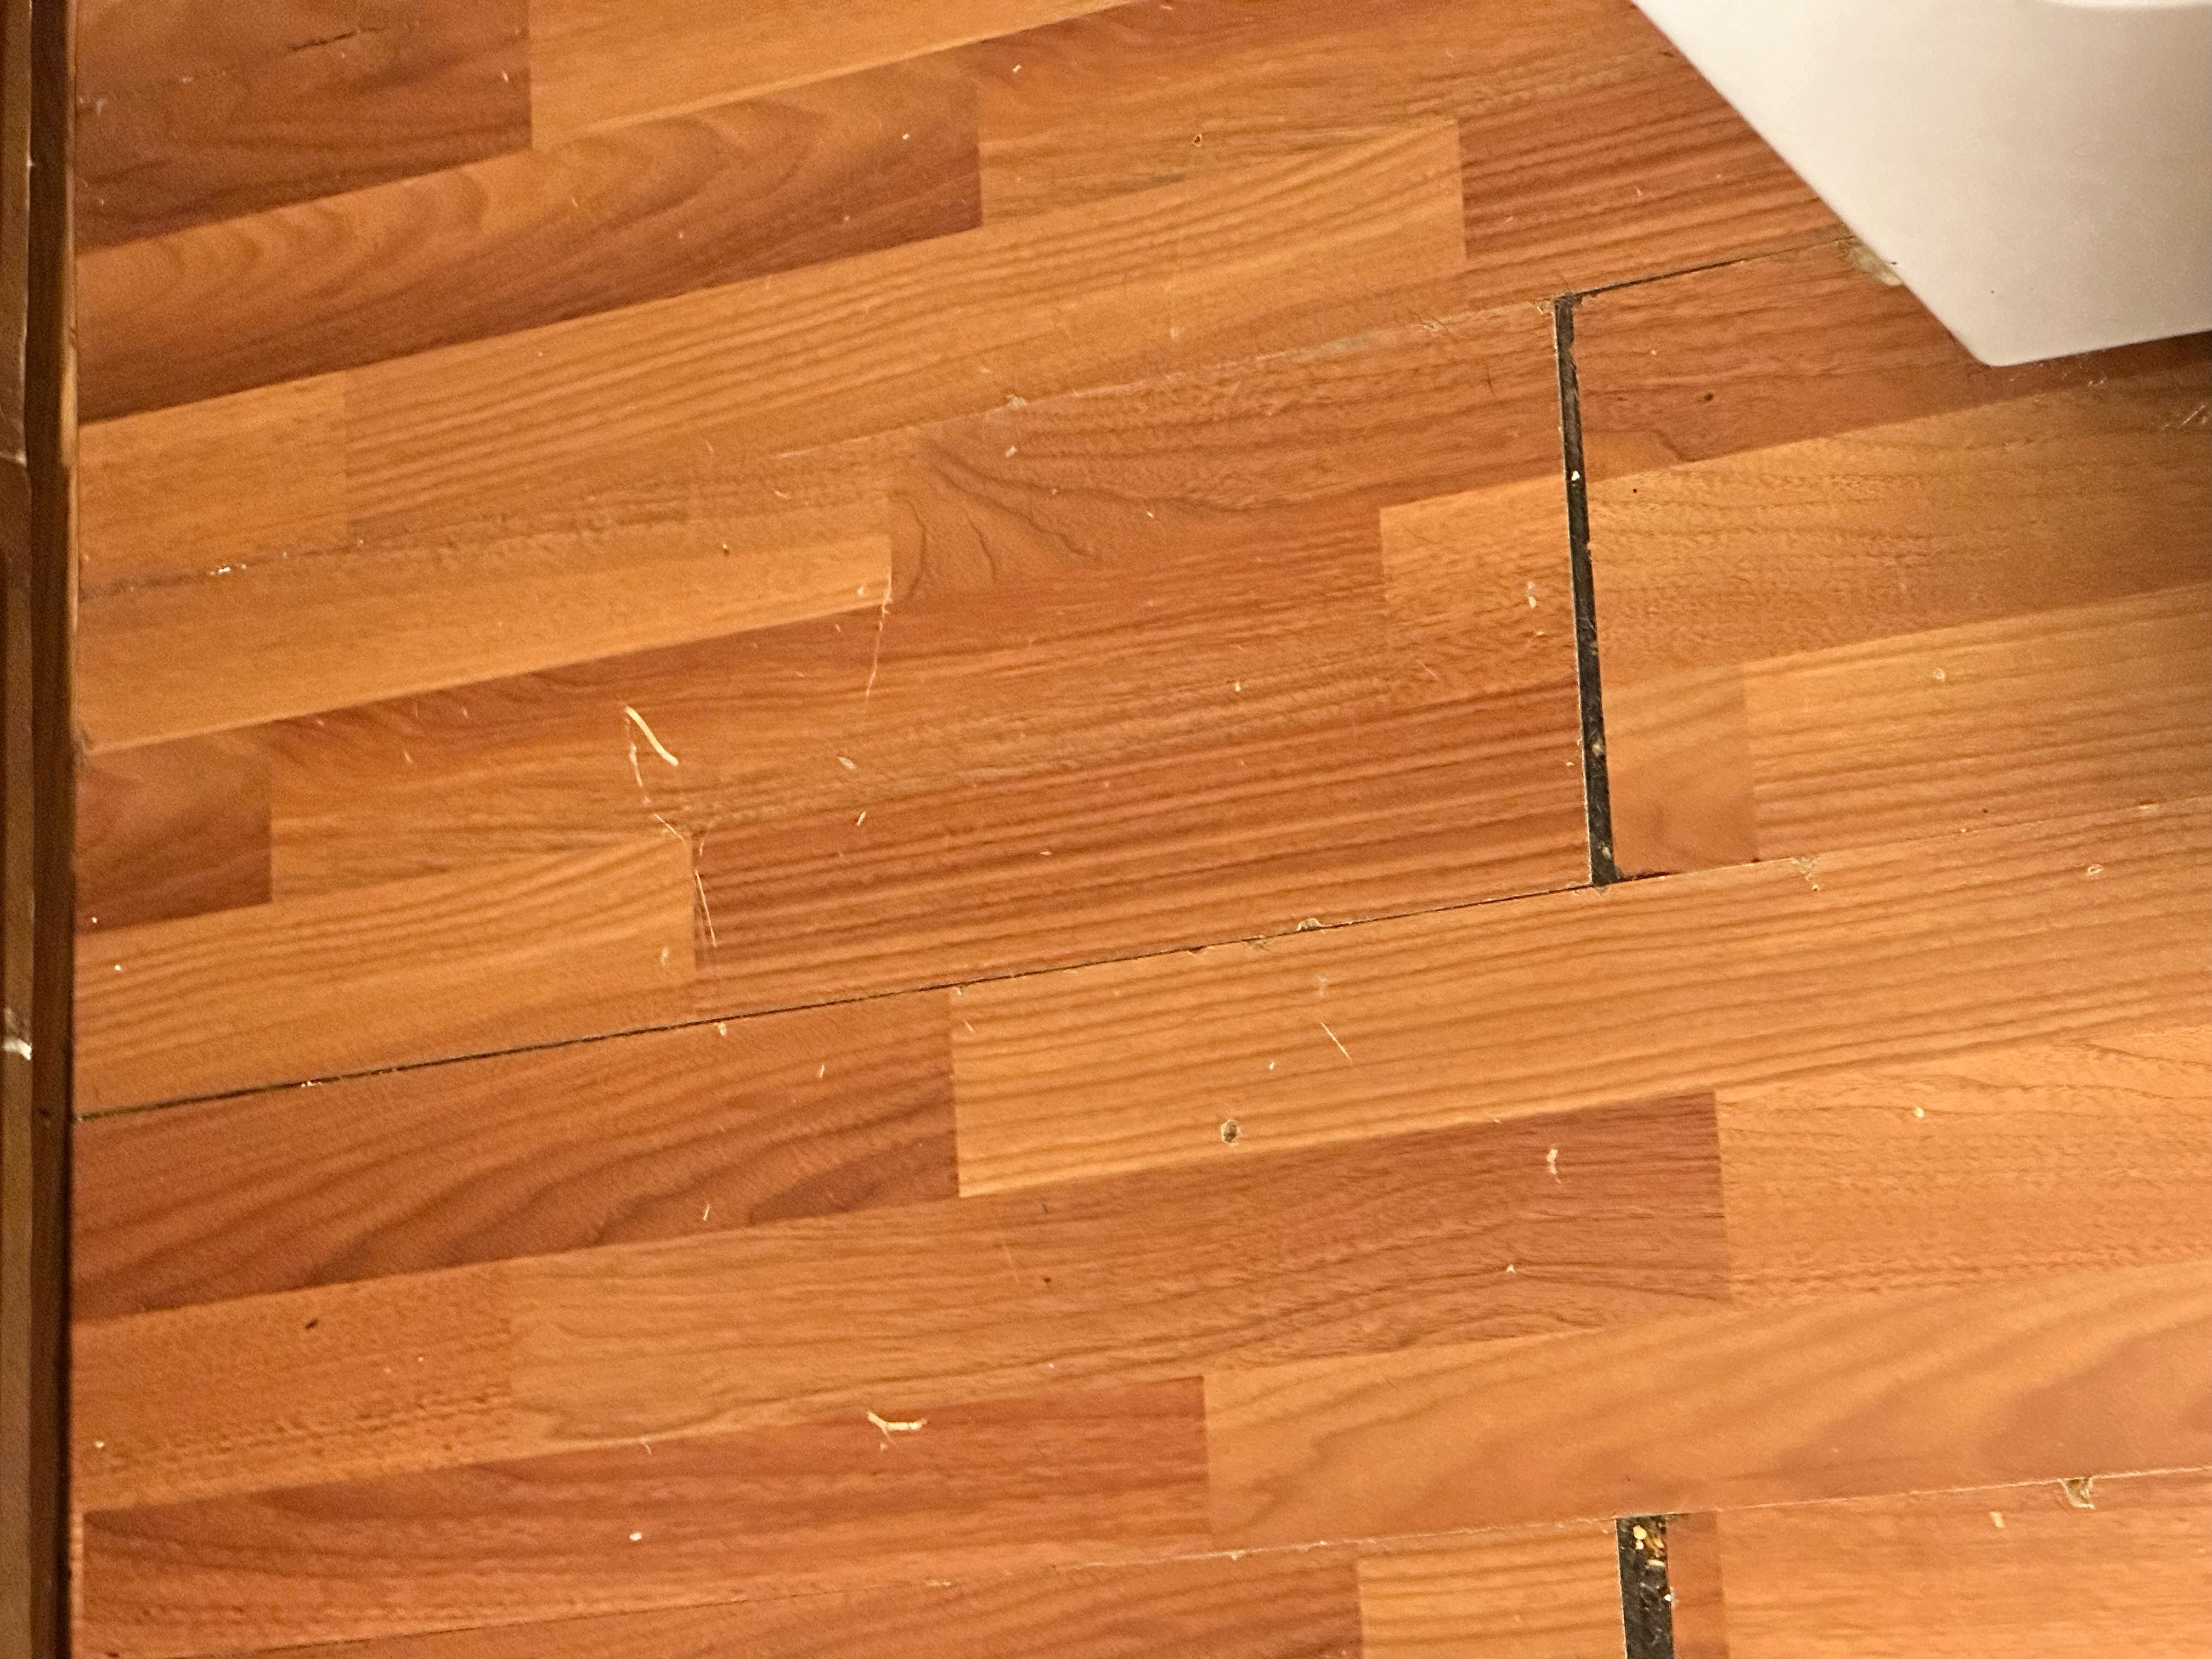
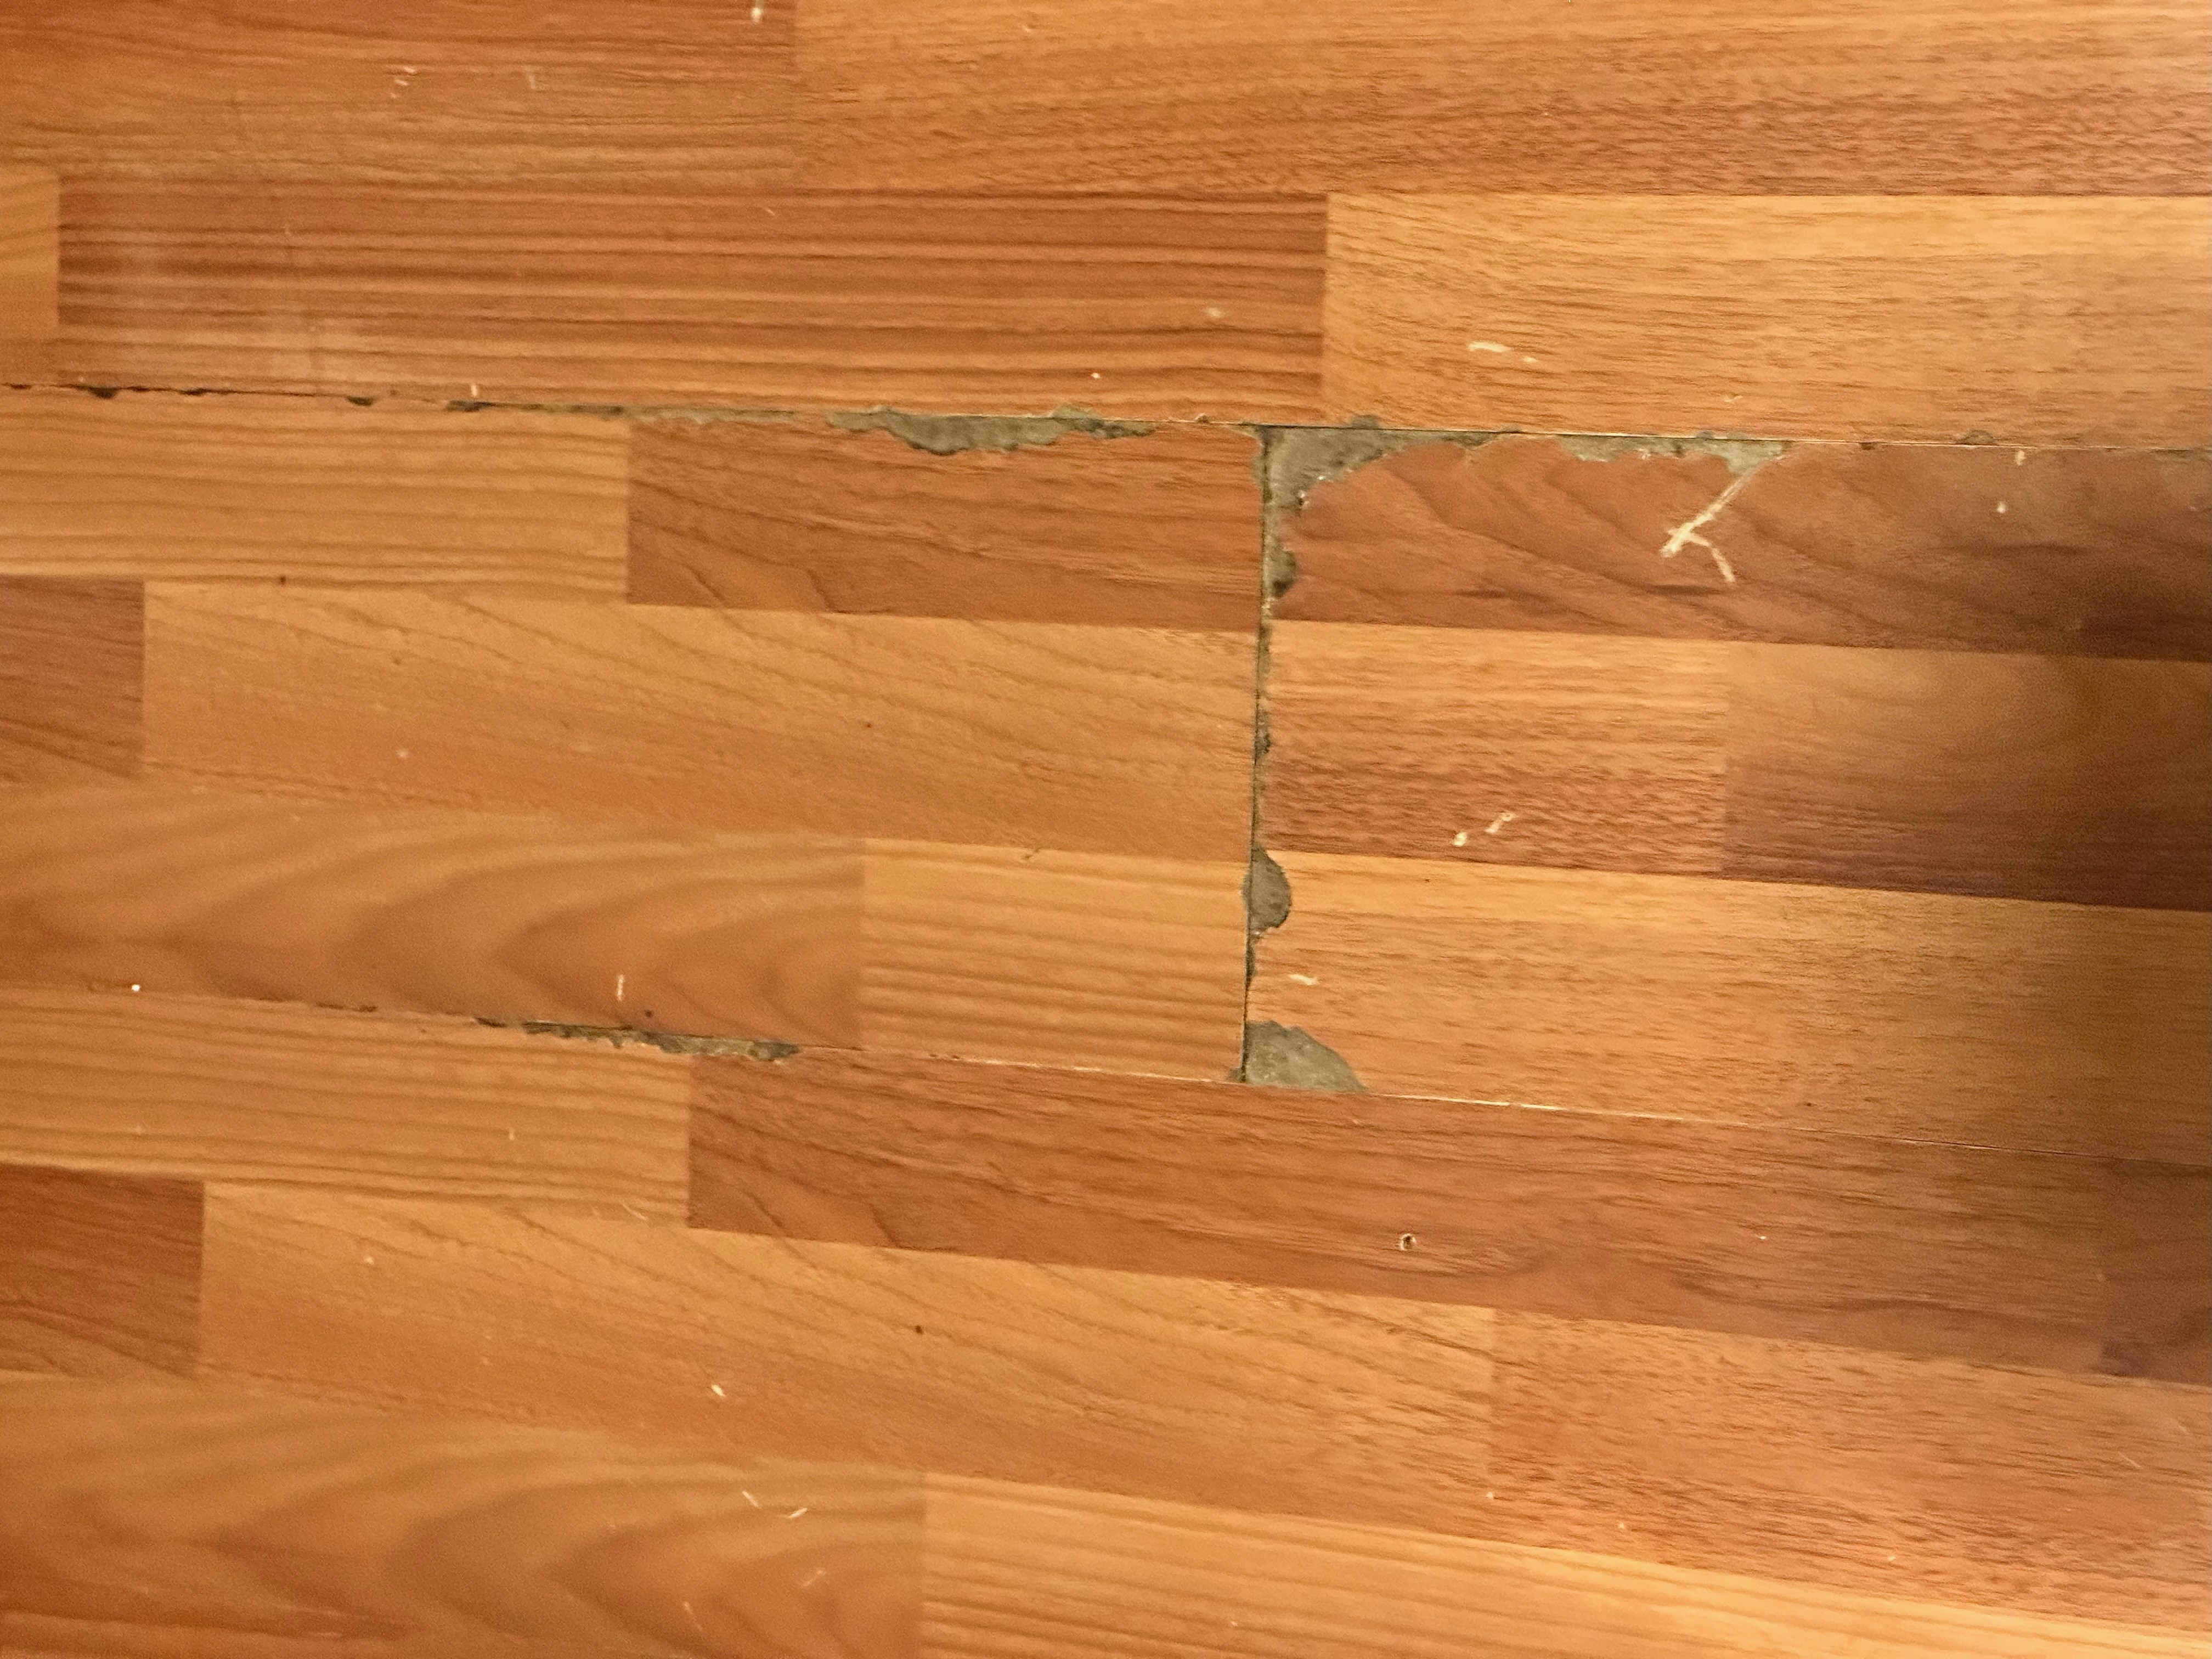
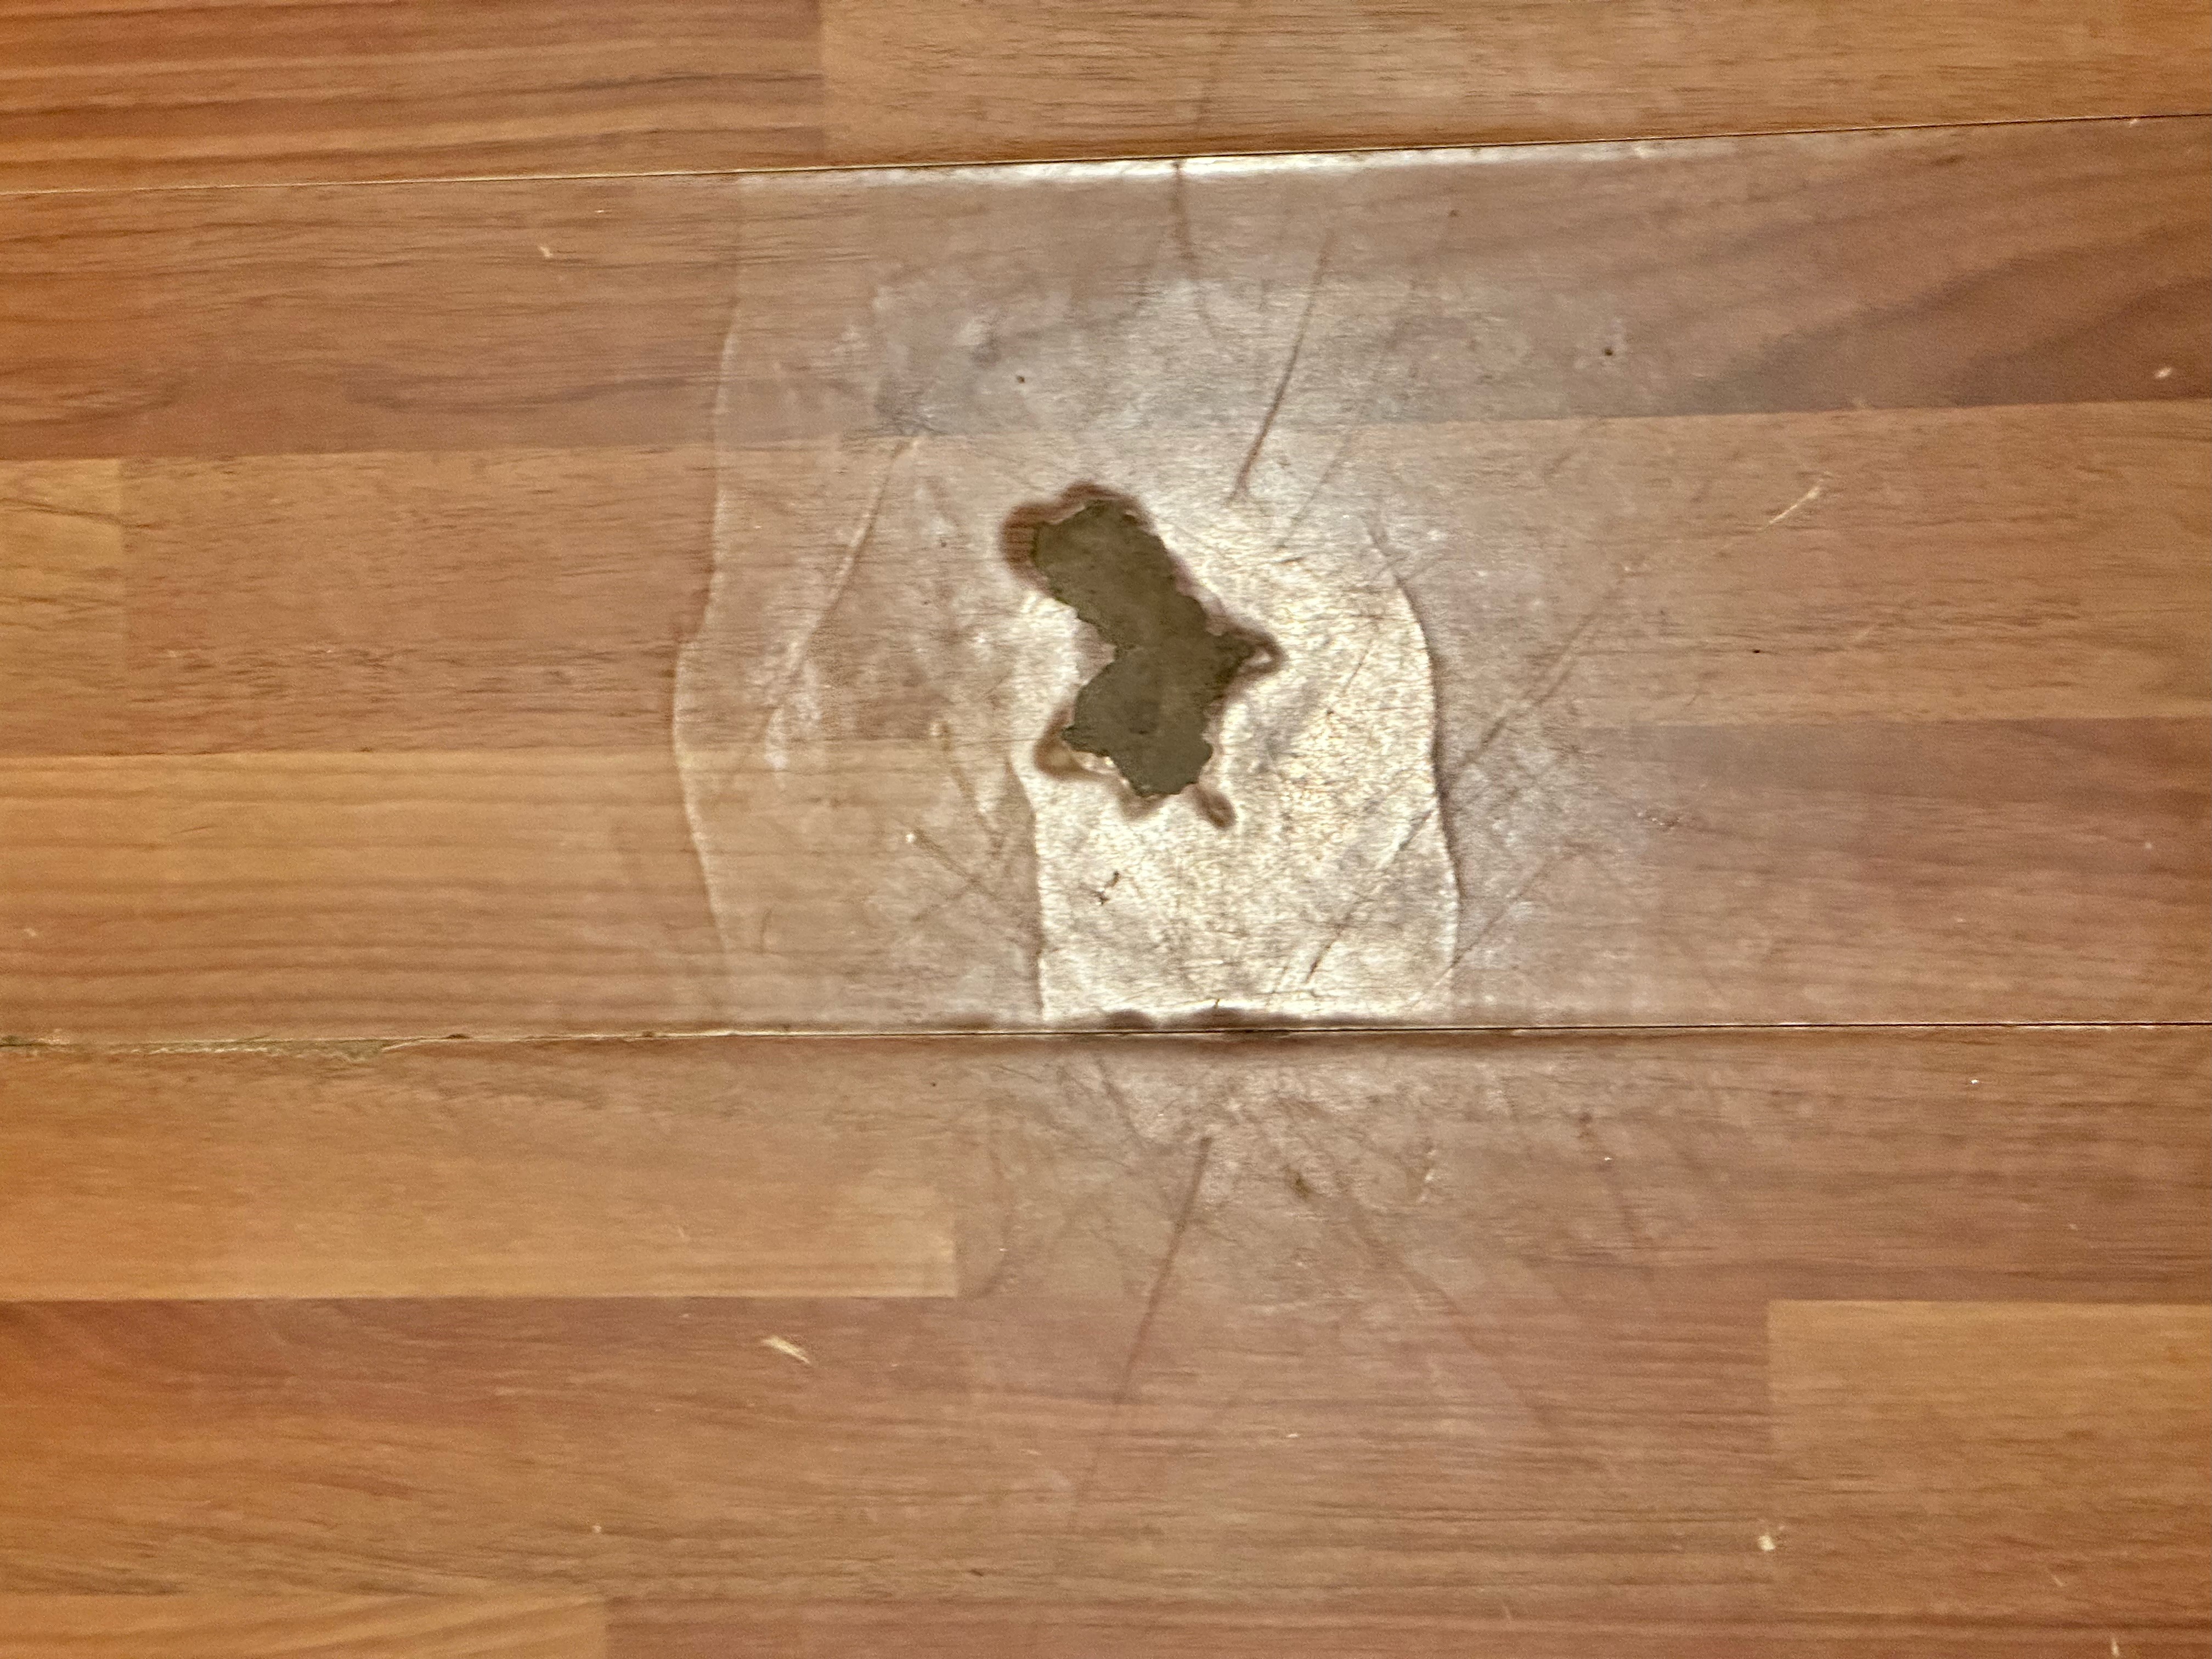
UnsureDescription:
Laminate flooringModel #:
UnsureValue:
$1900
Store:
Current Term:
1 Year
New?:
New
Purchase Date:
10/01/2023
Vendor Name:
Jacana WarrantyValidation
Disapproval Reason:
Due to the damage being caused by a water leak, it wouldn’t be covered under a manufacturer’s warranty or your Jacana policy. However, it should be covered under your home owner insurance policy base upon the description of how the damage occurred.
More Info?
Request More Information
More Info Response:
No Request Sent
Customer Diagnosis:
No Diagnosis
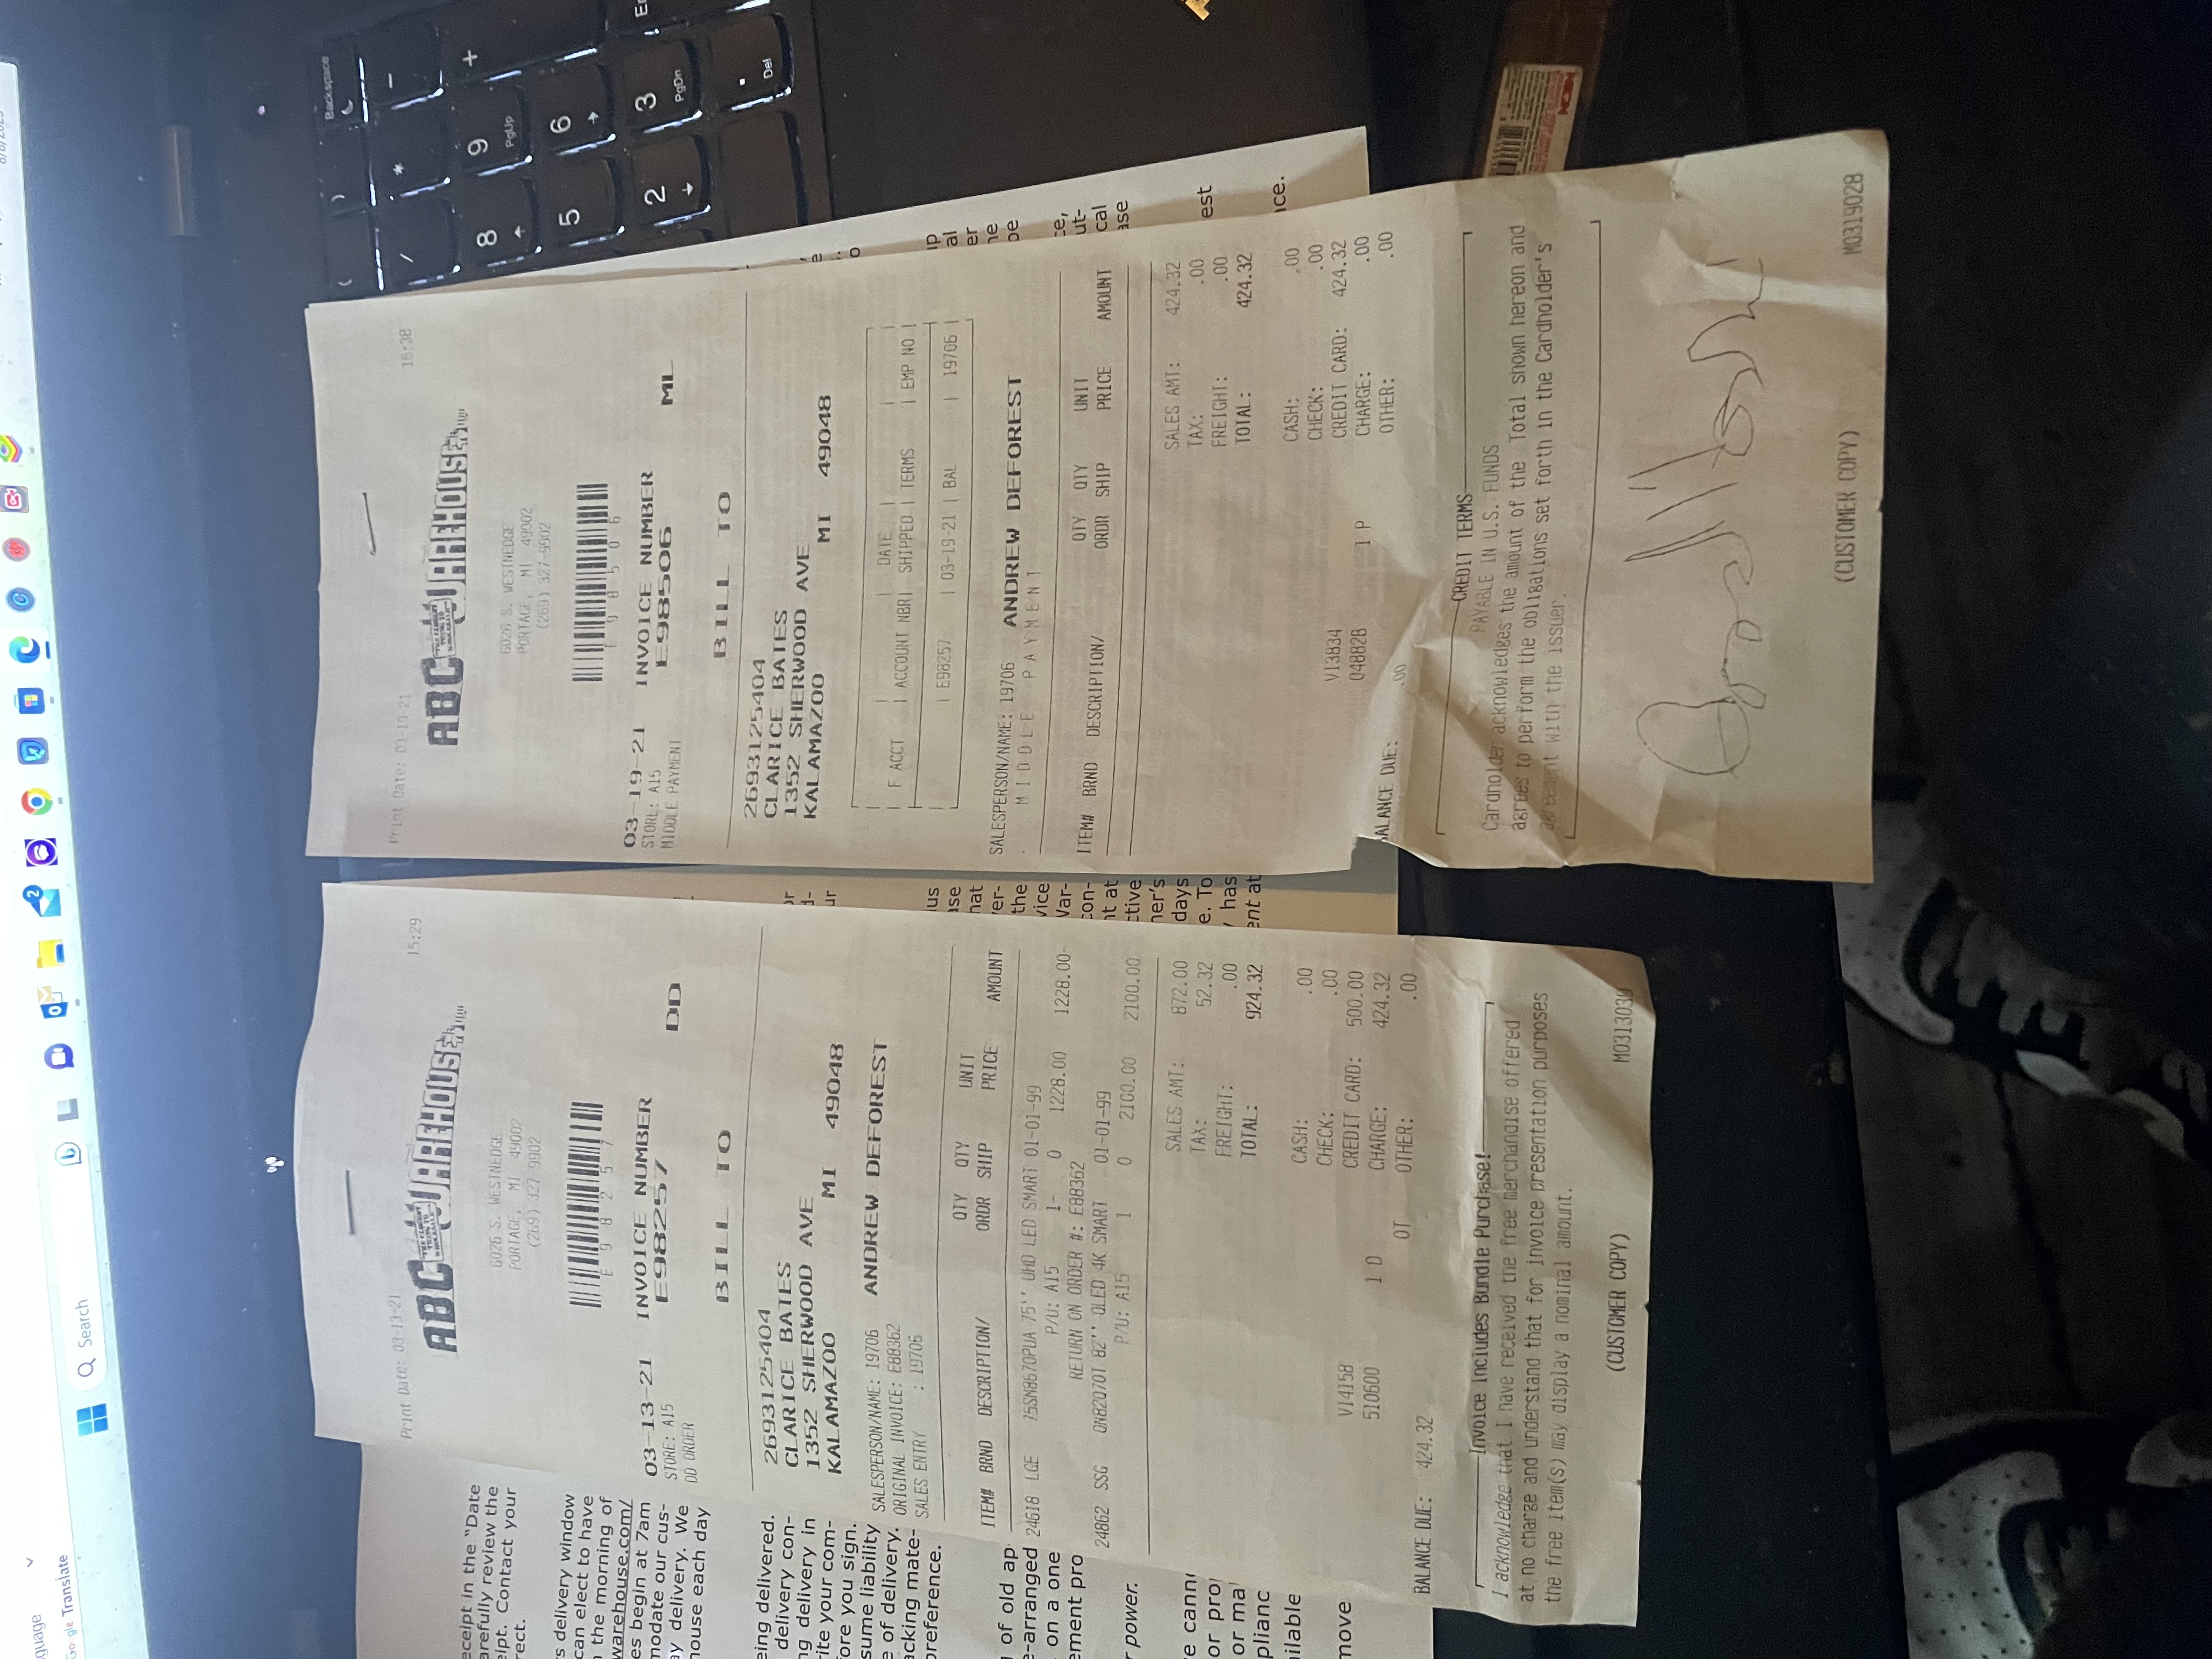
Receipts:
No Receipt Images
Damage:
No Damage Images
Additional Questions:
It’s over a year old. Did I enter the wrong info ?
Next, you will want to decide the action you want to take. Please note that on the file a claim form the customer submitted, they have the option to choose their preference.
Carry-In The “Carry-In” option means they carry their phone into a local repair shop. If they choose this option, the “Take Action” section of the claim will say, “Carry-In”. If the customer has a specific repair shop, the address and phone number will appear below the word, ”Carry-In.”
At this point all that’s needed is to click “Carry-In” on the claim header dropdown, labeled, “Action.”
Once this is done, the page will automatically redirect you to the Carry-in Dashboard at which point you can proceed with the claim.
Mail-In Another option is “Mail-In” which means the customer would prefer to have their phone mailed and shipped to a Service Center of your choice. If they choose this option, the “Take Action” section of the claim will say, “Mail-In.”
All that’s needed is to click “Mail-In” on the claim header dropdown, labeled, “Action.”
Once this is done, the page will automatically redirect you to the “Mail-In” Dashboard at which point you can proceed with the claim.
Gift Card or Fund Wallet If the Take Action is “Gift Card,” and the claim has been properly validated, and approved first, then you want to simply click, “Gift Card of Fund Wallet” on the dropdown labeled, “Action” on the claim header. Once this is done, a popup will appear confirming a successful payout. Click “Ok.” Once you confirm by clicking, “Ok,” then the page will refresh, and the claim will automatically disappear from the page, marked complete, and will now only appear on the “Claims Complete” dashboard. There will be nothing more to do. To confirm that payout you can click, “Payouts” on the menu, to visit the Payouts Dashboard. Here you will see the claims that are paid, listed by Claim Number.
Follow Up
Carry-In The “Carry-In” option means they carry their phone into a local repair shop. If they choose this option, the “Take Action” section of the claim will say, “Carry-In”. If the customer has a specific repair shop, the address and phone number will appear below the word, ”Carry-In.”
At this point all that’s needed is to click “Carry-In” on the claim header dropdown, labeled, “Action.”
Once this is done, the page will automatically redirect you to the Carry-in Dashboard at which point you can proceed with the claim.
Mail-In Another option is “Mail-In” which means the customer would prefer to have their phone mailed and shipped to a Service Center of your choice. If they choose this option, the “Take Action” section of the claim will say, “Mail-In.”
All that’s needed is to click “Mail-In” on the claim header dropdown, labeled, “Action.”
Once this is done, the page will automatically redirect you to the “Mail-In” Dashboard at which point you can proceed with the claim.
Gift Card or Fund Wallet If the Take Action is “Gift Card,” and the claim has been properly validated, and approved first, then you want to simply click, “Gift Card of Fund Wallet” on the dropdown labeled, “Action” on the claim header. Once this is done, a popup will appear confirming a successful payout. Click “Ok.” Once you confirm by clicking, “Ok,” then the page will refresh, and the claim will automatically disappear from the page, marked complete, and will now only appear on the “Claims Complete” dashboard. There will be nothing more to do. To confirm that payout you can click, “Payouts” on the menu, to visit the Payouts Dashboard. Here you will see the claims that are paid, listed by Claim Number.
Take Action
ManufacturerFollow Up
Warranty Details
WDOP:
11/19/2023Registered:
209 Days AgoClaim Created:
121 Days AgoAction:
REPAIR
Phase:
OEM
Coverage:
BD |
Value:
$1900
Deductible:
DD-BD: $0
Funding:
$1900 - Requested
Product Details
Order:
AFC_3Category:
ElectronicsPackage:
Product:
Jacana Care PlusPlan:
1-Year PlanManufacturer:
Nintendo WiiDescription:
Video Game Console Serial Number: LU663688768Model #:
Wii RVL-001Value:
Store:
N/A
Current Term:
N/A
New?:
N/A
Purchase Date:
Vendor Name:
AFCHomeClubValidation
Disapproval Reason:
Hello Ashley. Thank you for your cooperation while our team reviewed your claim details. Unfortunately due to the terms in your protection plan, this Video Game Console was determined by our claim group to be not covered by your plan because of the following: Age of the device (original purchase date/product release 17 years ago) and the product is not supported by the OEM. Based on the claim information provided and the evaluation your product details, Jacana is unable to approve your claim request at this time. We appreciate your understanding and we value you as our customer.
More Info?
Request More Information
More Info Response:
No Request Sent
Customer Diagnosis:
This device has stopped working due to age.
Receipts:
No Receipt Images
Damage:
No Damage Images
Additional:
No Additional
Additional Questions:
None
Next, you will want to decide the action you want to take. Please note that on the file a claim form the customer submitted, they have the option to choose their preference.
Carry-In The “Carry-In” option means they carry their phone into a local repair shop. If they choose this option, the “Take Action” section of the claim will say, “Carry-In”. If the customer has a specific repair shop, the address and phone number will appear below the word, ”Carry-In.”
At this point all that’s needed is to click “Carry-In” on the claim header dropdown, labeled, “Action.”
Once this is done, the page will automatically redirect you to the Carry-in Dashboard at which point you can proceed with the claim.
Mail-In Another option is “Mail-In” which means the customer would prefer to have their phone mailed and shipped to a Service Center of your choice. If they choose this option, the “Take Action” section of the claim will say, “Mail-In.”
All that’s needed is to click “Mail-In” on the claim header dropdown, labeled, “Action.”
Once this is done, the page will automatically redirect you to the “Mail-In” Dashboard at which point you can proceed with the claim.
Gift Card or Fund Wallet If the Take Action is “Gift Card,” and the claim has been properly validated, and approved first, then you want to simply click, “Gift Card of Fund Wallet” on the dropdown labeled, “Action” on the claim header. Once this is done, a popup will appear confirming a successful payout. Click “Ok.” Once you confirm by clicking, “Ok,” then the page will refresh, and the claim will automatically disappear from the page, marked complete, and will now only appear on the “Claims Complete” dashboard. There will be nothing more to do. To confirm that payout you can click, “Payouts” on the menu, to visit the Payouts Dashboard. Here you will see the claims that are paid, listed by Claim Number.
Take Action
Warranty Details
WDOP:
07/12/2023Registered:
19840 Days AgoClaim Created:
193 Days AgoAction:
Phase:
Coverage:
BDADH |
Value:
Deductible:
DD-BD: $0
Funding:
$0 - Requested
Product Details
Order:
AFC_3Category:
ElectronicsPackage:
Product:
Jacana Care PlusPlan:
1-Year PlanManufacturer:
SceptreDescription:
Television Serial Number: Model #:
40" LCD 1080p 60Hz HDTV X405BV-FHD3Value:
Store:
N/A
Current Term:
N/A
New?:
N/A
Purchase Date:
Vendor Name:
AFCHomeClubValidation
Disapproval Reason:
Hello Ashley. Thank you for your cooperation while our team reviewed your claim details. Unfortunately due to the terms in your protection plan, this Television was determined by our claim group to have a market value less than the required program deductible, Age of the device (original purchase date) and the product valuation. Based the claim information provide and the evaluation your product details Jacana, is unable to approve your claim request at this time. We appreciate your understanding and we value you as our customer.
More Info?
Request More Information
More Info Response:
No Request Sent
Customer Diagnosis:
The TV was nearly 10 years old. The screen went permanently black due to the power board and/or backlighting having a mechanical breakdown due to age. Replacing the TV was less costly than repairing it.
Receipts:
No Receipt Images
Additional:
No Additional
Additional Questions:
None
Next, you will want to decide the action you want to take. Please note that on the file a claim form the customer submitted, they have the option to choose their preference.
Carry-In The “Carry-In” option means they carry their phone into a local repair shop. If they choose this option, the “Take Action” section of the claim will say, “Carry-In”. If the customer has a specific repair shop, the address and phone number will appear below the word, ”Carry-In.”
At this point all that’s needed is to click “Carry-In” on the claim header dropdown, labeled, “Action.”
Once this is done, the page will automatically redirect you to the Carry-in Dashboard at which point you can proceed with the claim.
Mail-In Another option is “Mail-In” which means the customer would prefer to have their phone mailed and shipped to a Service Center of your choice. If they choose this option, the “Take Action” section of the claim will say, “Mail-In.”
All that’s needed is to click “Mail-In” on the claim header dropdown, labeled, “Action.”
Once this is done, the page will automatically redirect you to the “Mail-In” Dashboard at which point you can proceed with the claim.
Gift Card or Fund Wallet If the Take Action is “Gift Card,” and the claim has been properly validated, and approved first, then you want to simply click, “Gift Card of Fund Wallet” on the dropdown labeled, “Action” on the claim header. Once this is done, a popup will appear confirming a successful payout. Click “Ok.” Once you confirm by clicking, “Ok,” then the page will refresh, and the claim will automatically disappear from the page, marked complete, and will now only appear on the “Claims Complete” dashboard. There will be nothing more to do. To confirm that payout you can click, “Payouts” on the menu, to visit the Payouts Dashboard. Here you will see the claims that are paid, listed by Claim Number.
Carry-In The “Carry-In” option means they carry their phone into a local repair shop. If they choose this option, the “Take Action” section of the claim will say, “Carry-In”. If the customer has a specific repair shop, the address and phone number will appear below the word, ”Carry-In.”
At this point all that’s needed is to click “Carry-In” on the claim header dropdown, labeled, “Action.”
Once this is done, the page will automatically redirect you to the Carry-in Dashboard at which point you can proceed with the claim.
Mail-In Another option is “Mail-In” which means the customer would prefer to have their phone mailed and shipped to a Service Center of your choice. If they choose this option, the “Take Action” section of the claim will say, “Mail-In.”
All that’s needed is to click “Mail-In” on the claim header dropdown, labeled, “Action.”
Once this is done, the page will automatically redirect you to the “Mail-In” Dashboard at which point you can proceed with the claim.
Gift Card or Fund Wallet If the Take Action is “Gift Card,” and the claim has been properly validated, and approved first, then you want to simply click, “Gift Card of Fund Wallet” on the dropdown labeled, “Action” on the claim header. Once this is done, a popup will appear confirming a successful payout. Click “Ok.” Once you confirm by clicking, “Ok,” then the page will refresh, and the claim will automatically disappear from the page, marked complete, and will now only appear on the “Claims Complete” dashboard. There will be nothing more to do. To confirm that payout you can click, “Payouts” on the menu, to visit the Payouts Dashboard. Here you will see the claims that are paid, listed by Claim Number.
Take Action
Warranty Details
WDOP:
07/12/2023Registered:
19840 Days AgoClaim Created:
207 Days AgoAction:
Phase:
Coverage:
BDADH |
Value:
Deductible:
DD-BD: $0
Funding:
$0 - Requested
Product Details
Order:
100015015Category:
Home Theatre/TV’sPackage:
Product:
TelevisionPlan:
1-Year PlanManufacturer:
SamsungDescription:
samsung 82' TVModel #:
QN82Q7OT 82'' QLED 4K SMARTValue:
$2000
Store:
ABC WAREHOUSE
Current Term:
1 Year
New?:
New
Purchase Date:
08/17/2021
Vendor Name:
Jacana WarrantyValidation
Disapproval Reason:
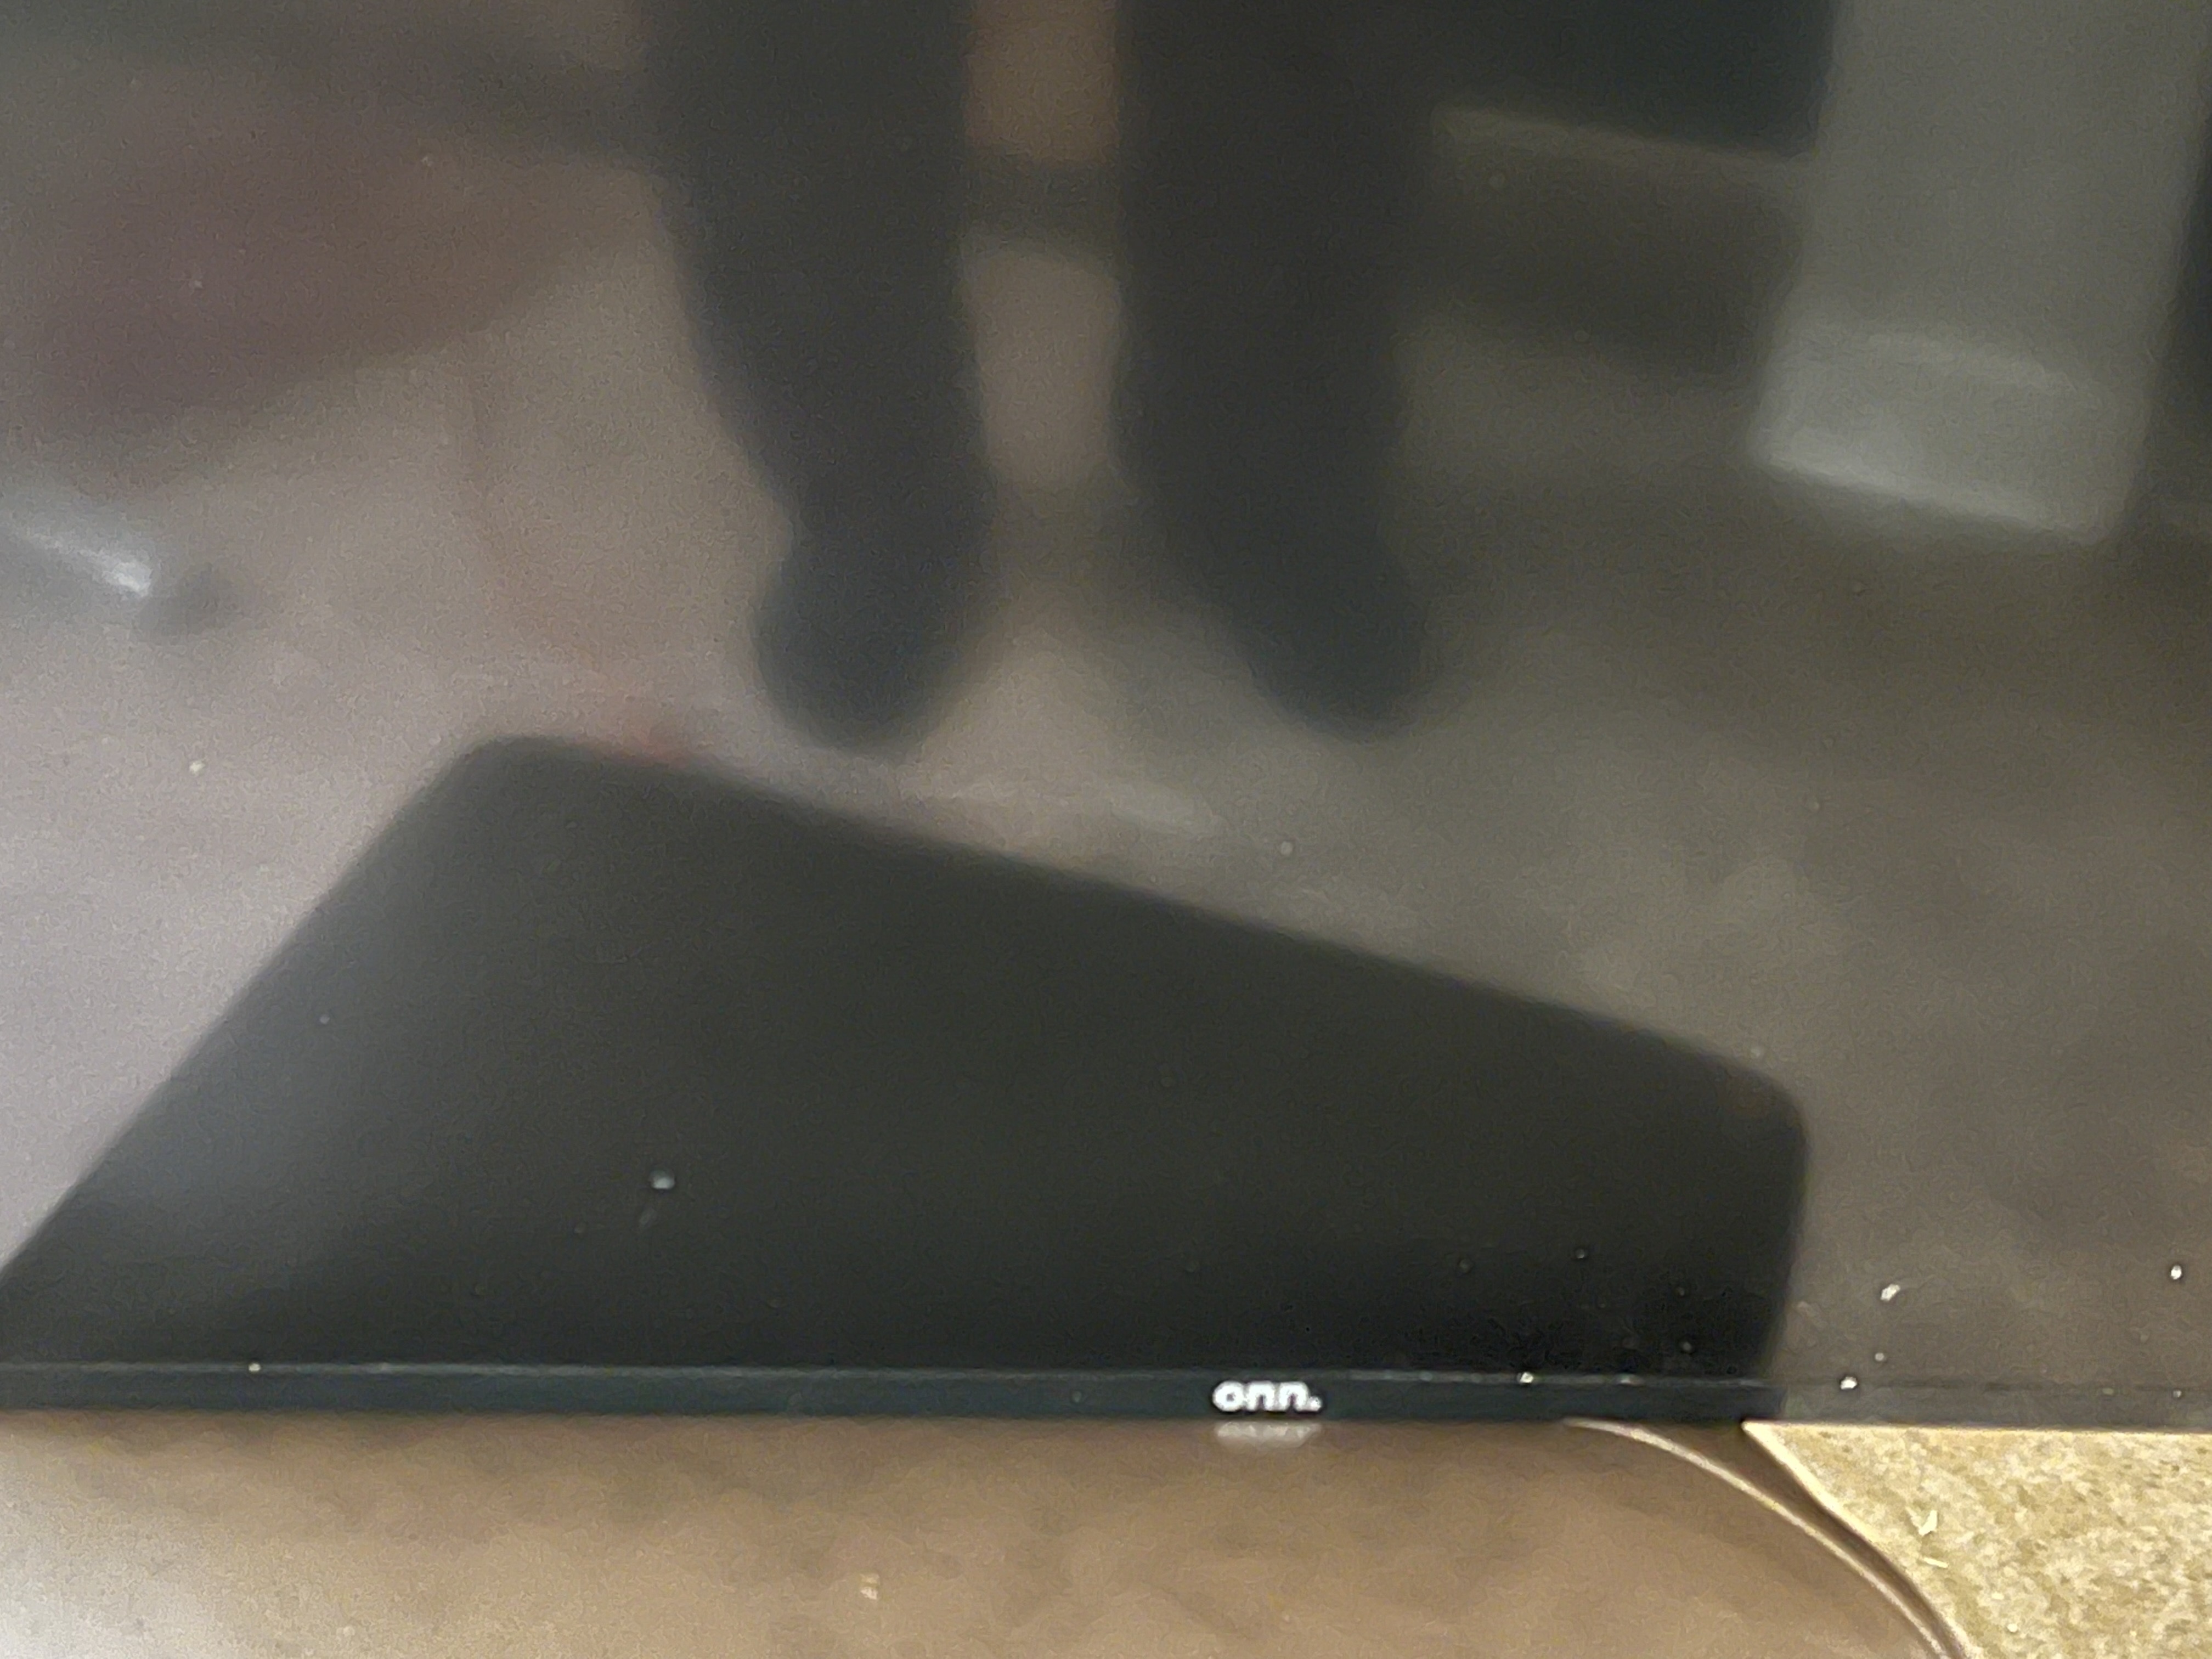
Hello Mr. Hoskins,Our apologies if it was not communicated of the finalization of your claim. Your protection plan for televisions are for mechanical breakdown only and doesn’t include Accidental Damage. As per the description of the issue with the screen damage – this would not be covered under the policy.
"painting my house moving the tv to paint the wall the tv fall over on its face and crack the screen and when I power it on the tv power on and power off and would not power back on"
If you have questions or need additional images, simply click the “Request More Information” link in the Validation Section next to the title and label, “More Info,” and fill out and submit the form.
The customer will get an email, with a link to respond verbally, as well as upload additional images.
When the customer submits their response and/or images you will get an email notifying you that the customer has responded.
The response will appear on your claims filed dashboard in the Validation Section under “More Info Response.”
The additional images will also appear on the ‘claims filed’ dashboard in the Validation Section under the line entitled: “Additional.” There you will see clickable links that will show you the additional photos that you requested.
If you desire further correspondence with the customer, please email them directly by clicking their email on the claim header next to their name.
Please note that a History of all “More Information” requests can be found by clicking the “Claims Inbox” menu item. Here you will see a list and History of all ‘Request More Information’ customer responses.
You also have the option of calling the customer. Their phone number is also located on the header of the claim. More Info Request:
Hello Ronald,The customer will get an email, with a link to respond verbally, as well as upload additional images.
When the customer submits their response and/or images you will get an email notifying you that the customer has responded.
The response will appear on your claims filed dashboard in the Validation Section under “More Info Response.”
The additional images will also appear on the ‘claims filed’ dashboard in the Validation Section under the line entitled: “Additional.” There you will see clickable links that will show you the additional photos that you requested.
If you desire further correspondence with the customer, please email them directly by clicking their email on the claim header next to their name.
Please note that a History of all “More Information” requests can be found by clicking the “Claims Inbox” menu item. Here you will see a list and History of all ‘Request More Information’ customer responses.
You also have the option of calling the customer. Their phone number is also located on the header of the claim. More Info Request:
Thank you for submitting your claim with us! After reviewing your claim details, the image of the damaged screen is for an ONN Television, however you registered your claim under a Samsung 82" screen. Please clarify the issue with the registered Samsung TV so that we can move forward with your claim. Thank you in advance!
Jacana Claims Team
More Info Response:
Waiting on Response
Customer Diagnosis:
painting my house moveing the tv to paint the wall the tv fall over on its face and crack the screen and when I power it on the tv power on and power off and would not power back on
Receipts:
Image
Damage:
Image
Additional:
No Additional
Additional Questions:
None
Next, you will want to decide the action you want to take. Please note that on the file a claim form the customer submitted, they have the option to choose their preference.
Carry-In The “Carry-In” option means they carry their phone into a local repair shop. If they choose this option, the “Take Action” section of the claim will say, “Carry-In”. If the customer has a specific repair shop, the address and phone number will appear below the word, ”Carry-In.”
At this point all that’s needed is to click “Carry-In” on the claim header dropdown, labeled, “Action.”
Once this is done, the page will automatically redirect you to the Carry-in Dashboard at which point you can proceed with the claim.
Mail-In Another option is “Mail-In” which means the customer would prefer to have their phone mailed and shipped to a Service Center of your choice. If they choose this option, the “Take Action” section of the claim will say, “Mail-In.”
All that’s needed is to click “Mail-In” on the claim header dropdown, labeled, “Action.”
Once this is done, the page will automatically redirect you to the “Mail-In” Dashboard at which point you can proceed with the claim.
Gift Card or Fund Wallet If the Take Action is “Gift Card,” and the claim has been properly validated, and approved first, then you want to simply click, “Gift Card of Fund Wallet” on the dropdown labeled, “Action” on the claim header. Once this is done, a popup will appear confirming a successful payout. Click “Ok.” Once you confirm by clicking, “Ok,” then the page will refresh, and the claim will automatically disappear from the page, marked complete, and will now only appear on the “Claims Complete” dashboard. There will be nothing more to do. To confirm that payout you can click, “Payouts” on the menu, to visit the Payouts Dashboard. Here you will see the claims that are paid, listed by Claim Number.
Carry-In The “Carry-In” option means they carry their phone into a local repair shop. If they choose this option, the “Take Action” section of the claim will say, “Carry-In”. If the customer has a specific repair shop, the address and phone number will appear below the word, ”Carry-In.”
At this point all that’s needed is to click “Carry-In” on the claim header dropdown, labeled, “Action.”
Once this is done, the page will automatically redirect you to the Carry-in Dashboard at which point you can proceed with the claim.
Mail-In Another option is “Mail-In” which means the customer would prefer to have their phone mailed and shipped to a Service Center of your choice. If they choose this option, the “Take Action” section of the claim will say, “Mail-In.”
All that’s needed is to click “Mail-In” on the claim header dropdown, labeled, “Action.”
Once this is done, the page will automatically redirect you to the “Mail-In” Dashboard at which point you can proceed with the claim.
Gift Card or Fund Wallet If the Take Action is “Gift Card,” and the claim has been properly validated, and approved first, then you want to simply click, “Gift Card of Fund Wallet” on the dropdown labeled, “Action” on the claim header. Once this is done, a popup will appear confirming a successful payout. Click “Ok.” Once you confirm by clicking, “Ok,” then the page will refresh, and the claim will automatically disappear from the page, marked complete, and will now only appear on the “Claims Complete” dashboard. There will be nothing more to do. To confirm that payout you can click, “Payouts” on the menu, to visit the Payouts Dashboard. Here you will see the claims that are paid, listed by Claim Number.
Take Action
Warranty Details
WDOP:
08/08/2023Registered:
984 Days AgoClaim Created:
213 Days AgoAction:
REPAIR
Phase:
EXT
Coverage:
BD |
Value:
$2000
Deductible:
DD-BD: $0
Funding:
$2000 - Requested
Product Details
Order:
100014436Category:
ElectronicsPackage:
Product:
SmartphonesPlan:
Monthly PlanManufacturer:
AppleDescription:
iPhone XRModel #:
iPhone XRValue:
$499
Store:
Current Term:
1 Year
New?:
New
Purchase Date:
04/25/2021
Vendor Name:
3PValidation
If you are dissatisfied with the damage, or believe it’s a breakdown issue, and not a cracked screen or accidental damage due to handling, or the phone doesn’t match the phone that is registered, or whatever reason then on the claim, in the validation section, you will see a link entitled “Write Customer” after the title: Disapproval. Click this link. A page will appear with a form that allows you to enter the reason you are disapproving the claim. Please communicate to the customer why you are disapproving and rejecting the claim. Click Submit.
Next on the claims filed screen, on the claim header you will see a round yellow circle, please hover your mouse over this icon, until you see the red x. Click the red X. After doing so, the customer will receive an email notifying them that the claim has been rejected, and will include the reason why.
Please notice the disapproval reason will appear on the claims filed dashboard, in the validation section, after the title “Disapproval” for future notice.
Approval is just as easy as disapproving a claim. Simply look for the yellow circle, on the header of the claim you want to approve, and click the green check mark to approve.
The customer will get an email notification notifying them that their claim has been validated and approved. Disapproval:
Write Customer
Next on the claims filed screen, on the claim header you will see a round yellow circle, please hover your mouse over this icon, until you see the red x. Click the red X. After doing so, the customer will receive an email notifying them that the claim has been rejected, and will include the reason why.
Please notice the disapproval reason will appear on the claims filed dashboard, in the validation section, after the title “Disapproval” for future notice.
Approval is just as easy as disapproving a claim. Simply look for the yellow circle, on the header of the claim you want to approve, and click the green check mark to approve.
The customer will get an email notification notifying them that their claim has been validated and approved. Disapproval:
More Info?
Request More Information
More Info Response:
No Request Sent
Customer Diagnosis:
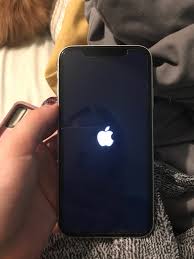
*top picture is how it looks, it's not my actual phone.* My phone died, and it wouldn't come back on after charging it. I would get the Apple logo but nothing else. It was restarting itself every time I would turn it on, I couldn't get passed the logo. I decided to take it to the Apple store because it was telling me it needed to be restored on a MacBook. Their employees stated that basically my system crashed and it's nothing that they can do about it, I have to get it replaced because the system itself cannot be fixed.
Receipts:
No Receipt Images
Damage:
Image
Additional:
No Additional
Additional Questions:
None
Next, you will want to decide the action you want to take. Please note that on the file a claim form the customer submitted, they have the option to choose their preference.
Carry-In The “Carry-In” option means they carry their phone into a local repair shop. If they choose this option, the “Take Action” section of the claim will say, “Carry-In”. If the customer has a specific repair shop, the address and phone number will appear below the word, ”Carry-In.”
At this point all that’s needed is to click “Carry-In” on the claim header dropdown, labeled, “Action.”
Once this is done, the page will automatically redirect you to the Carry-in Dashboard at which point you can proceed with the claim.
Mail-In Another option is “Mail-In” which means the customer would prefer to have their phone mailed and shipped to a Service Center of your choice. If they choose this option, the “Take Action” section of the claim will say, “Mail-In.”
All that’s needed is to click “Mail-In” on the claim header dropdown, labeled, “Action.”
Once this is done, the page will automatically redirect you to the “Mail-In” Dashboard at which point you can proceed with the claim.
Gift Card or Fund Wallet If the Take Action is “Gift Card,” and the claim has been properly validated, and approved first, then you want to simply click, “Gift Card of Fund Wallet” on the dropdown labeled, “Action” on the claim header. Once this is done, a popup will appear confirming a successful payout. Click “Ok.” Once you confirm by clicking, “Ok,” then the page will refresh, and the claim will automatically disappear from the page, marked complete, and will now only appear on the “Claims Complete” dashboard. There will be nothing more to do. To confirm that payout you can click, “Payouts” on the menu, to visit the Payouts Dashboard. Here you will see the claims that are paid, listed by Claim Number.
Carry-In The “Carry-In” option means they carry their phone into a local repair shop. If they choose this option, the “Take Action” section of the claim will say, “Carry-In”. If the customer has a specific repair shop, the address and phone number will appear below the word, ”Carry-In.”
At this point all that’s needed is to click “Carry-In” on the claim header dropdown, labeled, “Action.”
Once this is done, the page will automatically redirect you to the Carry-in Dashboard at which point you can proceed with the claim.
Mail-In Another option is “Mail-In” which means the customer would prefer to have their phone mailed and shipped to a Service Center of your choice. If they choose this option, the “Take Action” section of the claim will say, “Mail-In.”
All that’s needed is to click “Mail-In” on the claim header dropdown, labeled, “Action.”
Once this is done, the page will automatically redirect you to the “Mail-In” Dashboard at which point you can proceed with the claim.
Gift Card or Fund Wallet If the Take Action is “Gift Card,” and the claim has been properly validated, and approved first, then you want to simply click, “Gift Card of Fund Wallet” on the dropdown labeled, “Action” on the claim header. Once this is done, a popup will appear confirming a successful payout. Click “Ok.” Once you confirm by clicking, “Ok,” then the page will refresh, and the claim will automatically disappear from the page, marked complete, and will now only appear on the “Claims Complete” dashboard. There will be nothing more to do. To confirm that payout you can click, “Payouts” on the menu, to visit the Payouts Dashboard. Here you will see the claims that are paid, listed by Claim Number.
Take Action
Mail-inWarranty Details
WDOP:
01/01/2023Registered:
1098 Days AgoClaim Created:
331 Days AgoAction:
REPAIR
Phase:
EXT
Coverage:
BDADH |
Value:
$499
Deductible:
DD-BD: $0
Funding:
$424 - Requested$750 - Remaining
Product Details
Order:
100013778Category:
SmartphonesPackage:
NoneProduct:
SmartphonesPlan:
Monthly PlanManufacturer:
SamsungDescription:
Samsung Galaxy S21Model #:
Galaxy S21 UltraValue:
$899.23
Store:
Current Term:
1 Year
New?:
New
Purchase Date:
08/04/2022
Vendor Name:
ZepolValidation
If you are dissatisfied with the damage, or believe it’s a breakdown issue, and not a cracked screen or accidental damage due to handling, or the phone doesn’t match the phone that is registered, or whatever reason then on the claim, in the validation section, you will see a link entitled “Write Customer” after the title: Disapproval. Click this link. A page will appear with a form that allows you to enter the reason you are disapproving the claim. Please communicate to the customer why you are disapproving and rejecting the claim. Click Submit.
Next on the claims filed screen, on the claim header you will see a round yellow circle, please hover your mouse over this icon, until you see the red x. Click the red X. After doing so, the customer will receive an email notifying them that the claim has been rejected, and will include the reason why.
Please notice the disapproval reason will appear on the claims filed dashboard, in the validation section, after the title “Disapproval” for future notice.
Approval is just as easy as disapproving a claim. Simply look for the yellow circle, on the header of the claim you want to approve, and click the green check mark to approve.
The customer will get an email notification notifying them that their claim has been validated and approved. Disapproval:
Write Customer
Next on the claims filed screen, on the claim header you will see a round yellow circle, please hover your mouse over this icon, until you see the red x. Click the red X. After doing so, the customer will receive an email notifying them that the claim has been rejected, and will include the reason why.
Please notice the disapproval reason will appear on the claims filed dashboard, in the validation section, after the title “Disapproval” for future notice.
Approval is just as easy as disapproving a claim. Simply look for the yellow circle, on the header of the claim you want to approve, and click the green check mark to approve.
The customer will get an email notification notifying them that their claim has been validated and approved. Disapproval:
More Info?
Request More Information
More Info Response:
No Request Sent
Customer Diagnosis:
Screen broke.
Receipts:
No Receipt Images
Damage:
Image
Additional:
No Additional
Additional Questions:
None
Next, you will want to decide the action you want to take. Please note that on the file a claim form the customer submitted, they have the option to choose their preference.
Carry-In The “Carry-In” option means they carry their phone into a local repair shop. If they choose this option, the “Take Action” section of the claim will say, “Carry-In”. If the customer has a specific repair shop, the address and phone number will appear below the word, ”Carry-In.”
At this point all that’s needed is to click “Carry-In” on the claim header dropdown, labeled, “Action.”
Once this is done, the page will automatically redirect you to the Carry-in Dashboard at which point you can proceed with the claim.
Mail-In Another option is “Mail-In” which means the customer would prefer to have their phone mailed and shipped to a Service Center of your choice. If they choose this option, the “Take Action” section of the claim will say, “Mail-In.”
All that’s needed is to click “Mail-In” on the claim header dropdown, labeled, “Action.”
Once this is done, the page will automatically redirect you to the “Mail-In” Dashboard at which point you can proceed with the claim.
Gift Card or Fund Wallet If the Take Action is “Gift Card,” and the claim has been properly validated, and approved first, then you want to simply click, “Gift Card of Fund Wallet” on the dropdown labeled, “Action” on the claim header. Once this is done, a popup will appear confirming a successful payout. Click “Ok.” Once you confirm by clicking, “Ok,” then the page will refresh, and the claim will automatically disappear from the page, marked complete, and will now only appear on the “Claims Complete” dashboard. There will be nothing more to do. To confirm that payout you can click, “Payouts” on the menu, to visit the Payouts Dashboard. Here you will see the claims that are paid, listed by Claim Number.
Carry-In The “Carry-In” option means they carry their phone into a local repair shop. If they choose this option, the “Take Action” section of the claim will say, “Carry-In”. If the customer has a specific repair shop, the address and phone number will appear below the word, ”Carry-In.”
At this point all that’s needed is to click “Carry-In” on the claim header dropdown, labeled, “Action.”
Once this is done, the page will automatically redirect you to the Carry-in Dashboard at which point you can proceed with the claim.
Mail-In Another option is “Mail-In” which means the customer would prefer to have their phone mailed and shipped to a Service Center of your choice. If they choose this option, the “Take Action” section of the claim will say, “Mail-In.”
All that’s needed is to click “Mail-In” on the claim header dropdown, labeled, “Action.”
Once this is done, the page will automatically redirect you to the “Mail-In” Dashboard at which point you can proceed with the claim.
Gift Card or Fund Wallet If the Take Action is “Gift Card,” and the claim has been properly validated, and approved first, then you want to simply click, “Gift Card of Fund Wallet” on the dropdown labeled, “Action” on the claim header. Once this is done, a popup will appear confirming a successful payout. Click “Ok.” Once you confirm by clicking, “Ok,” then the page will refresh, and the claim will automatically disappear from the page, marked complete, and will now only appear on the “Claims Complete” dashboard. There will be nothing more to do. To confirm that payout you can click, “Payouts” on the menu, to visit the Payouts Dashboard. Here you will see the claims that are paid, listed by Claim Number.
Take Action
Mail-inWarranty Details
WDOP:
08/04/2022Registered:
632 Days AgoClaim Created:
632 Days AgoAction:
REPAIR
Phase:
OEM
Coverage:
BDADH |
Value:
$899.23
Deductible:
DD-ADH: $0
Funding:
$899.23 - Requested


